Tis the holiday season again. Lot’s of parties to go to. Lot’s of family and friends to visit with and talk to. Lots of great food to eat. As the officially, or unofficially, appointed photographer, it has fallen upon you to document the event for the historical archives. Since you are the one family member that always has a camera in their hands, you are the chosen one everyone will expect to make photos. But that’s okay. If you are like me, photography is a labor of love. It’s a part of you that happens as naturally as breathing. Personally, I enjoy making the photos more than I do the party or event itself.
Here are 12 things you can do to improve your holiday photos:
Check your camera settings
There is nothing worse than shooting for an entire day, or over an entire holiday season, only to discover that your camera was set wrong. Your ISO was set too high, so all of your photos have noise. Your white balance was set for fluorescent lighting. You had your camera set on shutter priority with a shutter speed of 1/30th of a second. Long story short, your photos end up looking terrible. So, before taking the first photo of this joyous holiday, check your camera settings. I learned a little Acronym from Scott Kelby to help me remember what to do. It’s called WHIMS. W-White Balance, H-Highlight clipping warning, I-ISO, M-Mode (JPEG or RAW), and S-Shooting mode (Aperture Priority, Shutter Priority, Manual, or full Automatic if you desire).
Here is a good article from Scott that explains WHIMS:
Scott’s Photography School of Hard Knocks
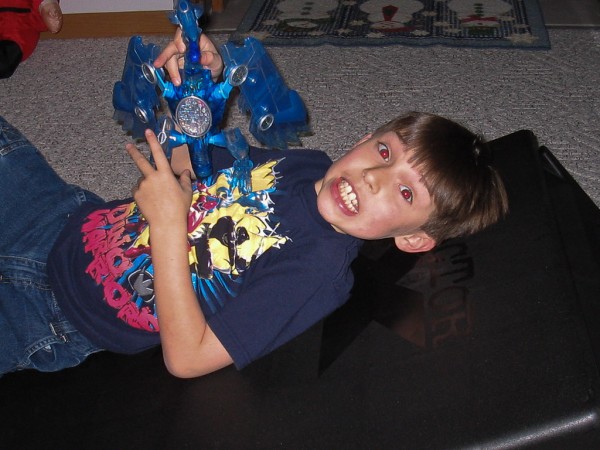
Shoot family and friends
All the artsy Christmas photos are neat, but Christmas is about family and friends. You will hear me mention more than once that your job as a photographer is to tell a story. In order to tell a story about Christmas, you must make photos of people. It’s alright to flex your artistic muscles some and do some Christmas photography not involving people. In most cases though, you want the artsy photos to be more of a supporting element to the story.
Focus on the eyes
This pretty well applies to any and all photography where people or animals are the subjects. When people connect and form relationships, it’s through the eyes. That applies in person as well as in photographs. So, if your subject’s eyes are tack sharp, it draws the viewer into the photo that much faster.
I realize that it’s not always easy to focus on the eyes, especially in low-light situations. There are some tricks that you can use in these situations. Focusing on a person’s cheeks is a good substitute. The cheeks are close to the same plane of focus as the eyes. The front of someone’s shirt or blouse is going to be somewhat along the same plane of focus as the eyes provided the person is standing or sitting straight up. Particularly, the buttons or zippers on a shirt or blouse is usually easy to see and focus on. The bottom line is to find something along the same plane of focus as the eyes and focus on it. If you make a conscious effort on this, over time it will become second nature. You won’t even have to think about it, because you have formed a good photography habit.
Get rid of red eye
Everybody has seen red-eye in photographs. Basically, when a flash is close to the lens, the light from the flash travels straight out, illuminates the reflective part of the human eye which appears red, and the returning light travels straight back into the lens. You can see the same effect by shining a flashlight at an animal at night. Only the colors vary depending on the animal.
The simplest way to get rid of red-eye is to get your flash away from the lens. The reflection still happens, but the reflective red light travels at an angle that is not captured by the lens. If you are using a point-and-shoot camera, you don’t have a choice. The flash is permanently mounted. Although you can turn on red-eye reduction, which uses pre-flashes to dilate the subject’s eyes to minimize the red-eye effect.
For DSLR owners, do not use the little pop-up flash on your camera. Get a good quality flash, and either mount it on a flash bracket attached to your camera or learn to do bounce flash. Using a flash bracket, the flash will be higher which not only eliminates red-eye but also throws any shadows downward and out of the photo. Using this technique does create somewhat harsh lighting though. I recommend and prefer using bounce light instead. Bounce flash not only eliminates the red-eye, but it also creates a soft, even lighting. Bounce flash takes some skill though. You have to learn the techniques and practice.
Fill the frame
You don’t want to put a wide-angle lens on your camera and shoot from across the room. It’s okay to pop off a few like this, but only a few. When a photo shows an entire room filled with 10 or 20 people, there is no one subject. It’s a room full of clutter pulling the viewer’s eye in different directions.
A better approach is to get in close. The main subject needs to dominate the frame. There should never be a question as to who or what the main subject of your photo is or what is happening.
I’m a strong proponent of using shorter focal lengths on your camera, getting in close and interacting with your subject. But at the same time, you don’t want to interfere or be a distraction. Sometimes it’s better to stay back and use a longer focal length. That’s where a good-quality zoom lens comes in handy.
Get down at eye level
Christmas is for family and friends. Christmas is especially for the children. Do you want to make the photos of your children opening their gifts to really pop? Then get down at eye level with them or even slightly lower if possible. This rule applies to anyone or anything you photograph, including animals. We, as humans, connect with others through our eyes. It’s a whole lot easier to make that connection if we are able to look directly into the eyes. Being at eye level or slightly below also has the effect of adding power and dominance to your subject. Try it out and see what you like.
Here is a good article I found on Digital Photography School:
How to go Beyond the Regular Composition Advice for Getting the Best Shots of your Kids
Be ready for the silly moments
Unless someone is paying you to photograph a holiday event, you are just a family member or friend who happens to also be a photographer. Your primary responsibility during the holiday event is to be part of the group. Photography is secondary. With that being said, you still want to be able to document the party or event to the best of your ability.
For the most part, the photos you make will be the standard everyday holiday photos. Little Suzi opening up her Christmas present. Dad carving a turkey at Christmas dinner. Aunt Sue toasting the joyous holiday and a Happy New Year. But, there are always those special little moments when the unexpected happens. Little Suzi shoots egg nog out her nose because she’s laughing so hard. Aunt Sue has a little too much to drink and climbs onto Santa’s lap. These are the moments that make each holiday special and unique. This is where your skills as a photographer really have to shine.
Even though you are having a good time with family and friends, you need to stay alert to what’s going on around you. Keep your camera turned on and in standby, with everything preset to what you think you will need to document the event. Know where you are and where your camera is at all times. When the unexpected happens, grab your camera, move in, get the shot, and get out. If you’re Ninja enough, your family and friends usually won’t realize that you took a photo or two. They will be totally surprised later when they see the photos.
Do a group photo (use timer or remote)
I’ve read a few articles that say not to take group photos because they are too contrived. I disagree with that. Yes, group photos may appear to be a little stiff and contrived, but down the road, you will be glad that you took a group photo. Of all the photos my Dad took when I was a child, I remember the group photos best. Dad setting up the camera with a timer and then running across the room to jump in the photo at the last second. It’s been 50 years now, and I still like looking at those group photos.

So for every party or get-together, I recommend setting up some kind of group photo. Find a nice location to make the photo. Set your camera up on its tripod along with the flash. Gather the group together. Use your camera’s timer feature or a cordless remote. Then jump in the photo with everyone, and make a couple of images.
I prefer informal group photos. It’s just more interesting letting people do their own thing. Of course, there will always be someone (bossy) who will try taking charge and arranging everyone. Let them. Then make some minor tweaks to make sure everyone can be seen in the photo. Who cares if someone is doing bunny ears behind Uncle Ned? Who cares that little Timmy is making an ugly face? It makes the image unique and tells a story. If you are concerned with perfection, then try your best to do a very static, formal group. But then make a few extra images and just let people go crazy.
I recommend that you make any group photos early in the event. People usually look their best at the beginning. No family fights have broken out yet resulting in hurt feelings or people leaving. Hopefully, everyone is sober at the beginning of the party. I would go for making the group photo within an hour of the designated start of the party or event. Coordinate with the event host to determine if everyone has arrived. The host is also a great help in gathering everyone up.
Do timed exposure of tree and house
Your Christmas photo story wouldn’t be complete without a nice photo of the Christmas tree and one of your decorated house. Okay, time to stretch those artistic muscles now. This is where it’s alright to make some photos without any people in the picture. However, if you can make a good photo of the Christmas tree or the decorated house and include some family or friends in the photo, well that’s just like icing on the cake.
Here are a few articles and one YouTube video I found that will guide you to making beautifully timed exposures of your Christmas lights and tree.
How to Photograph Christmas Lights
Camera Settings for Night Photography of Christmas Lights (YouTube video)
How to Successfully Photograph Your Christmas Tree
Know when to put your camera away
I’m sure everyone has seen or heard of the Uncle or Cousin who brings a camera to every event and relentlessly photographs every single second. They are in everybody’s way taking pictures and nobody can see because they have flash blindness. Don’t be that guy (or gal). A good photographer is almost Ninja-like. They get in, get the photo, and get back out. If they did it right, nobody even realized they were there. You don’t have to photograph every single second of the party. I typically have my camera and flash turned on and setting somewhere easy to access. If I see a photo opportunity, I grab the camera, pop off a couple of frames from different angles, then put the camera back down. You are there to spend time with your friends and family. Making some good photos is just an added perk.
Before and after shots – Tell a story
Every good story has a beginning, middle, and end. A photo story is no different. Any holiday event or party is typically the middle of the story. Before the party, there are preparations, which could last hours if not days. There are guests arriving. There are family and friends greeting one another. After the event or party, there are mounds of discarded Christmas paper, stacks of dirty dishes, and exhausted family and friends laying around. All of these are key elements of your story, and I encourage you to document them. They will be a very small part of your story, but still very important. So, if possible arrive early to any event or party and plan to stay late.
Edit your photos down so that they tell your story
The family member who has to show a few hundred photos of the family vacation or Christmas day has always been a standing joke in movies and television. Of course today, with digital photography, it could be thousands of photos or hours of video. Please, don’t force your family and friends to look at all of your Christmas photos. Your job as the photographer is to tell a story, and you only need a dozen or so good photos to accomplish that. Think of yourself as a photojournalist, telling a story from beginning to end, and you only have a two-page spread to do it in. A term I’ve heard in the writing world is “kill your darlings.” Meaning, no matter how much you love all of those images you took, as a photographer it’s your job to kill off all accept the very best photos.
Here are other good articles I found on Christmas photography
16 Digital Photography Tips for Christmas
Christmas Photography Tips
10 Tips for Better Christmas Photos