If you are just starting out in video production, you don’t need to go crazy and spend a lot of money on video lighting. There are several free and low-cost options available.
Natural and Existing Lighting (free options)
You really don’t need to invest in any lighting to get started in video. Mother Nature provides a wonderful light source if you know how to make use of it. Here are a few ways to utilize the sun and existing lighting.
- Outdoors on overcast days. A slightly overcast day is one of the best sources of natural light. It’s natures giant softbox giving you a nice even lighting.
- Outdoors with clear skies and sunny conditions. Creates harsh shadows on the face. You can still make great videos, but it would help to put your talent near a light, neutral colored wall or use a large bounce card to fill in the shadows.
- Indoors with talent near a large window. Same rules as above apply. Cloudy conditions would be best. Regardless of lighting outside, you will want to use some kind of bounce card to reflect some light back into the shadows on the face.
- Indoors in any evenly lit room. The thing to be most concerned with here is determining what the primary light source is and setting your camera’s white balance accordingly.
Continuous Video Lights (low-cost options)
For a small investment, you can dramatically improve your videos by using a continuous light source. Here are a couple of options that make good video lights and can be used in still photography as well. So, you get a twofer.
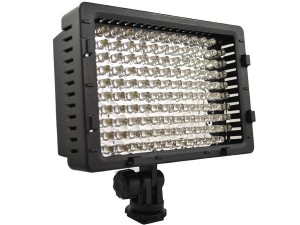
LED video lights
- Usually small, battery powered light banks that can be mounted directly on top of your video camera or DSLR. There are larger banks that mount onto light stands and plug into a wall outlet, but they are usually more expensive.
- LED lights typically provide you with a daylight balanced color temperature. Some of the pricier LED light banks have a variable light balance.
- Prices for an LED video light ranges anywhere from around $30 all the way up into the hundreds of dollars.
- Although you can mount LED lights on top of your video camera or DSLR, I would recommend only using that method for quick location video shots.
- If you have the option, get the light off of your camera. Position the LED light at a 45 degree angle to your subject and use some kind of reflector or bounce card on the other side to fill in shadows.
- I also use my LED light for in studio macro photography.
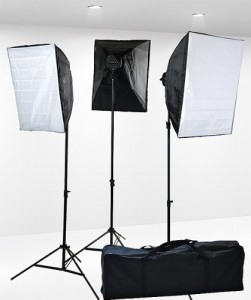
Compact Fluorescent Lighting (CFL) Light Kits
- For studio use, even if your studio is your living room, I recommend getting a soft box lighting kit with compact fluorescent lighting (CFL) bulbs.
- For between $50 and $200, you can get a kit comprised of anywhere from one to five light sources and a carrying case. Each light source is made up of a stand, a light head holding 3 to 5 CFL bulbs, and a soft box.
- The CFL bulbs in these kits are daylight balanced.
- This type of light is considered a cold light source, meaning it does not produce any significant heat. There are video lights available that, although very bright and powerful, will make you talent sweat and can easily cause a fire if not handled properly.
How I Use My CFL Lighting Kit to Make Videos
I have a three-light CFL kit. My lighting setup is very basic. In the cinematography and video world, I use what’s called three-point lighting. For those of you familiar with portraiture lighting, you will recognize this setup as something in the realm of Loop Lighting or Rembrandt Lighting depending on how you position the main light.
- The first light is the main light. It’s set to full power, positioned at a 45 degree angle to the talent, and high enough so that it points down at approximately a 45 degree angle.
- My second light is a fill light. It is set to half power, positioned on the opposite side and close to the camera, and at approximately eye level.
- The third light acts as a hair light. It too is set to half power, positioned directly across from the main light, behind the left shoulder of the talent, and high enough so that it too is pointing down at a 45 degree angle lighting the hair and the shoulders.
There are many other lighting options available to those serious about making videos. It’s not uncommon for the higher quality video lighting to cost hundreds, thousands, and even tens of thousands of dollars. My aim here is just an introduction to video production without spending a small fortune, so I have only touched on the lower-cost lighting options.
Regardless of whether you have any kind of video lighting, try your hand at video production with your DSLR, your point-and-shoot camera, or your cell phone for that matter. Just start shooting. You can improve your skills and add to your equipment later. For those of you who do give video production a try, please share a link to any of your videos below.