When learning to shoot video with a DSLR camera, the first thing I discovered is that I had to learn several things simultaneously. In order to experiment with camera settings, I needed to at least have a decent foundation of good lighting and white balance. In order to experiment around with different types of sound recordings, I needed to know a little bit about the camera settings.
Basically, while experimenting with the various camera settings, lighting conditions, and sound recording systems, I had to set up and record a series of short videos and stills. But rather than discuss all of these at the same time, I will be breaking up camera settings, video lighting, and sound recording into at least three separate posts.
DSLR Video Camera Settings 101
First thing I’ve learned about camera settings in video production is to do everything in manual mode. Sure the camera is capable of shooting videos using built-in automation. But when making videos with the camera set to automatic, you run the risk of changes occurring during your video that will disturb the continuity. If the f/stop changes, your depth of field shifts. If the camera senses a light quality change, it will change the white balance. Another possibility is the exposure changes just slightly causing scenes not to match up. So, for all of my video productions, I will be working in manual mode only.
In DSLR video production, just like in still photography, exposure is a three-legged stool. The exposure triangle is made up of ISO, shutter speed, and the f/stop. However, that’s where the similarities end. Traditionally in still photography, ISO is chosen first based on the existing lighting conditions. Then shutter speed and f/stop are used to control exposure along with freezing motion and controlling depth of field. In video production, the shutter speed is selected first based on the frame rate of the video quality, then f/stop is used to get the desired depth of field, and finally, ISO is used to adjust for a good exposure.
Selecting the White Balance
This is pretty straightforward enough. Select a white balance for your DSLR that matches the light quality of the existing light. Outside is easy enough. Select daylight or cloudy white balance, depending on the situation. When inside, you will have to set the white balance for the type of artificial lighting you will be using. All of my video lighting is daylight balanced, so that’s the white balance I will be using.
Selecting the Proper Shutter Speed
The camera’s shutter speed is the easiest side of the exposure triangle to solve and the very first one I set. It’s important to match the shutter speed to the frame rate of the video quality selected. Typically, a DSLR will have a frame rate of 24 frames per second (fps), 30 fps, or 60 fps. To match the shutter speed of the DSLR, you double the frame rate and add one over the top. Thereby, 24 fps becomes a shutter speed of 1/50th of a second, 30 fps becomes 1/60th of a second, and 60 fps becomes 1/125th of a second.
You can deviate away from a matched shutter speed, but you will get some rather creative effects. Choosing a slower shutter speed will blur your footage giving it a somewhat dreamy effect. Choosing a faster shutter speed will give your footage a sharper, somewhat choppy feel. In both cases, panning or moving your camera will enhance the effect.
Selecting the f/Stop to Achieve Desired Depth of Field
The f/stop is used to control the depth of field in the video. Just like in still photography, a small f/value results in a large diaphragm opening and very little depth of field, whereas a large f/value results in a small diaphragm opening and a lot of depth of field.
Since my intentions with video production are to do talking head type training videos and some interviews, a shallow depth of field is more important to me. I want to isolate the talent from the background. So for all of my experiments this month, I will primarily be setting my camera at either f/2.8 or f/3.2.
Selecting the ISO to Balance the Exposure
With the shutter speed and f/stop set, I can now use the camera’s ISO to make the final adjustments to get the proper exposure. Basically, I want to adjust the ISO to center the camera’s light meter. There are limits to how far the ISO can be pushed though.
Just like in still photography, the camera’s sensor is prone to noise at higher ISOs. From what I’ve seen and read, the noise level is acceptable up to an ISO of around 800 to 1600 in most cameras. Each camera and sensor is different though, so you will have to experiment. Something to note; the dollar value of your camera and the camera’s sensor size is not always a good indicator as to its susceptibility to noise.
Final Camera Settings Selected for Initial Video Tests
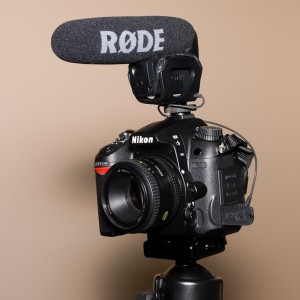
Here are my rudimentary camera settings for my talking head and interview videos using my Nikon D7000 DSLR with a Nikon 50mm f/1.8 lens.
- White Balance – The continuous lighting I will be using for video lights are daylight balanced, so I will set the camera’s white balance to the daylight setting.
- Shutter Speed – I plan on shooting everything at the highest quality setting of 1920 X 1080 with a frame rate of 24 fps. With that knowledge, I will select a shutter speed of 1/50th of a second to match my frame rate.
- f/Stop – For initial tests, I will select an f/stop of 3.2, which is a third of a stop above f/2.8, so there should be very little difference in depth of field.
- ISO – I’ll use the ISO to achieve an acceptable exposure. Initial tests using two of the continuous video lights I purchased, one set as a main with all five lights on and the second set as a fill with only three lights on, allowed me to shoot with ISO 200. Switching over to my single LED light source that mounts to the top of the camera, required an ISO of 1600 to get the same exposure.
- Focus Mode – Focus wasn’t discussed in this article, but just like everything else, I will be using a manual focus. Autofocus in DSLRs is very slow for video use, and typically very noisy. The camera’s sound recorder will pick up the focus motors. Also there is always a risk of autofocus hunting while shooting a video. Autofocus hunting is irritating enough when shooting stills. I sure don’t want to deal with it in video production.
Got Any Advice on Camera Settings
If you have any experience in DSLR camera settings for shooting video, please share your suggestions in the comments below. Or if you have any questions about this project, feel free to ask. If I don’t know the answer, I’m sure I can dig it up somewhere. Or maybe one of the other readers will chime in.