I’ve been takingTrey Ratcliff’s Complete HDR course over the summer. The course is a series of 20 videos covering every aspect of HDR photography along with 75 images to practice with. The images supplied are the same ones that Trey uses in the training videos.
For those of you somewhat new to photography, or have never heard of HDR photography, let me give you a short explanation. HDR stands for High Dynamic Range. It’s using post-processing to combine several images of the same scene, each made at a different exposure. The purpose is to overcome the limitations of the camera’s sensor in capturing the entire range of light available in a scene.
There are two parts to HDR photography, capturing the images and post-processing the images. For the rest of this article, I will talk about my initial adventures in capturing my first HDR images. In the follow-up article, I will go into post-processing.
Capturing HDR images
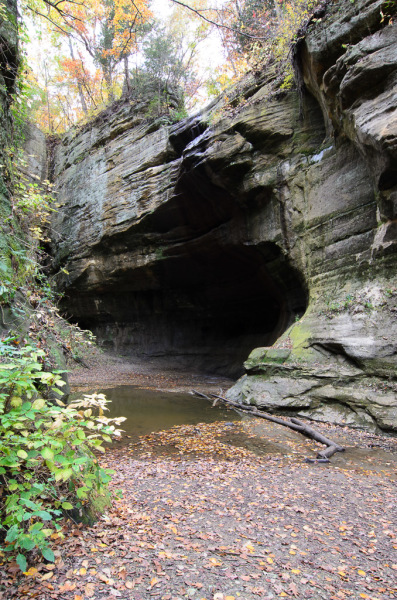
I recently visited Starved Rock State Park in central Illinois to photograph waterfalls. Turns out the waterfalls are just a trickle in the fall. Who knew? Probably everyone other than myself. Regardless, I went ahead and made some images.
The waterfalls are located deep inside canyons, so there is a fairly large exposure range between the brightly lit trees and the deep shadows up under the rock formations. I figured it would be the perfect opportunity for my first experiments with HDR.
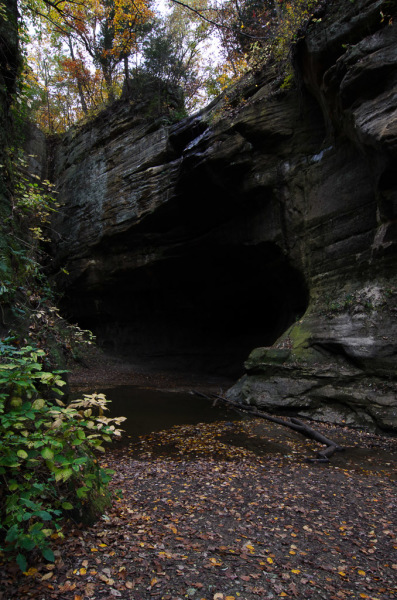
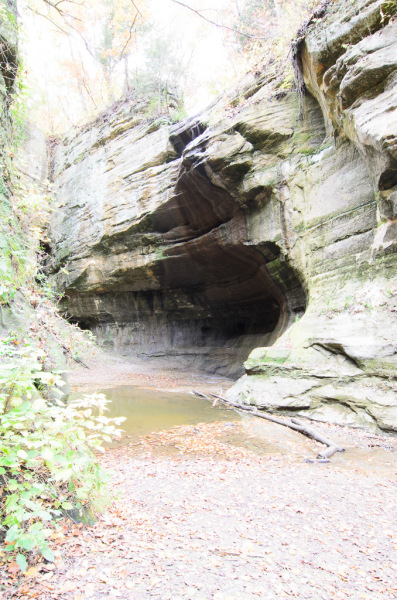
In HDR photography, instead of making a single image, it’s common practice to make three separate images with a technique called bracketing. Bracketing is simply making a series of photos at different Exposures Values (EV). Typically, one image is normally exposed to capture midtones, a second image underexposed to capture highlights, and a third image overexposed to capture the shadow detail.
If you are unfamiliar with the term Exposure Value (EV), it is the same as a Stop of Light. Increasing your exposure by 1 EV is doubling the amount of light allowed to get to the camera’s sensor. Decreasing your exposure by 1 EV is halving the amount of light to the camera’s sensor.
The recommended HDR setup is making the first image at the normal exposure, the second image underexposed by 2 EVs, and the third image overexposed by 2 EVs.
You can actually make any number of images with any exposure variations you see fit. Say, five exposures with one EV variation each. I’ve even heard of photographers who go up as high as nine images. For the most part, though, three exposures as described above are more than adequate in most situations.
Setting the camera for HDR photography
Bracketing with DSLR or mirrorless camera systems is actually quite easy. Almost all modern cameras, including many point-and-shoot and cell phone cameras, have a built-in Auto Bracketing feature.
To turn on Auto Bracketing: (consult your Operator’s Manual for specifics)
- Select Auto Bracketing feature in menu or by pressing Auto Bracketing button.
- Select the number of shots you want to bracket.
- Select the Exposure Value (EV) you want to increment each shot.
When the shutter is triggered, the camera will automatically make the number of images you specified and vary the Exposure Value on each.
The basic steps I follow in capturing images for HDR photography:
- Mount the camera on the tripod and frame the image.
- Select an ISO as low as the lighting conditions will allow to reduce image noise.
- Put camera in Aperture Priority mode. Can also be in Manual mode if desired.
- Select an f/Stop that will deliver the desired depth of field.
- Turn the camera’s Auto Bracketing feature on, and set to Normal, 2 Under, 2 Over.
- Trip the shutter using a shutter release or a timed delay. I typically use a 2-second timed delay.
Additional notes for shooting HDR images:
- It is possible to shoot HDR handheld, but that is more of an advanced procedure. I recommend using a tripod until you fully know how to do HDR photography. Even then, I only use the camera handheld when there are no other options to steady the camera.
- When setting the ISO, keep in mind that the camera will be selecting the shutter speed. You may have to increase or decrease the ISO to get close to a shutter speed that suits your purpose.
- When shooting HDR, you always select the f/Stop and let the camera vary the exposures using shutter speed. The reason for this is that varying the f/Stops would cause a shift in the depth of field between images.
- The shutter can be released at the camera, but you run the risk of inducing vibration into your images.
That’s it for the basics of capturing HDR images. If you are interested in learning more about HDR, I recommend you visit Trey Ratcliff’s website, Stuck in Customs. There you will find a completely free tutorial on HDR photography.
If you have any questions about HDR photography or any HDR tips that you would like to share, please leave a comment below.
In the next article, I will discuss my first post-processing attempts using an HDR software program called Photomatix Pro.